
iOS - How to Video Full HD sharing through Dropbox
To do it you need to have available a Dropbox account (If you can not easily initiate easily and quickly) and on the iPhone or iPad apps have Dropbox installed.
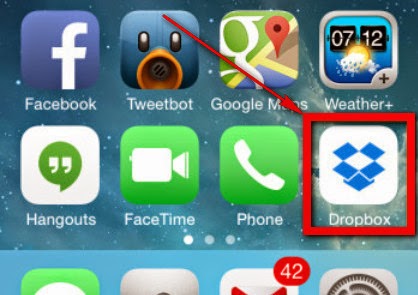
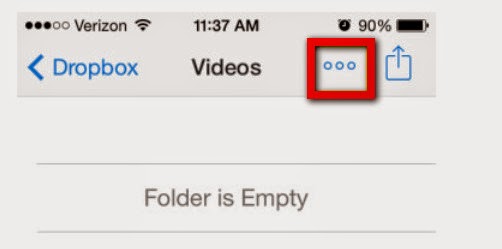
Step 1: You open the Dropbox app on the device by clicking the Dropbox icon on the iPhone screen, your iPad (figure below)
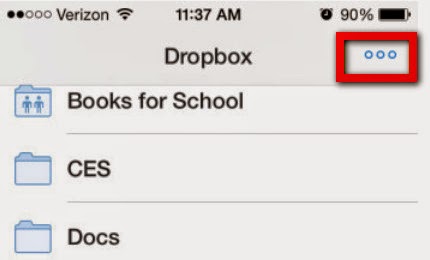
 Step 2: You click on the tab "Options" (Figure below)
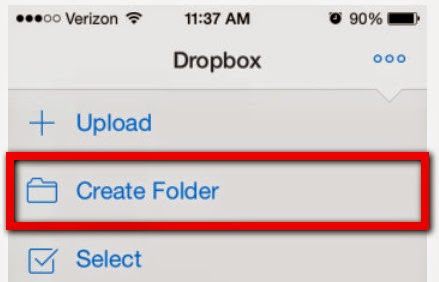
Step 3: You click on the "Create Folder" (Figure below)
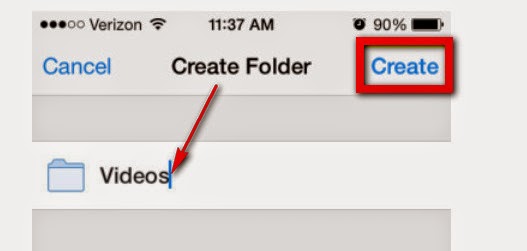
Step 4: After entering the directory name you click "Create" (Figure below)
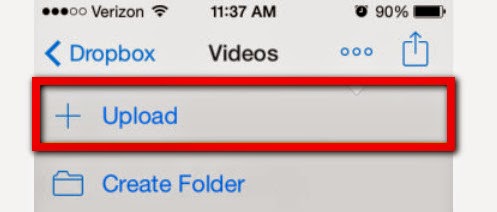
 Step 5: Here you select the Options tab again (Figure below)
 Step 6: You click the "Upload" to download the Full HD Video from iPhone, iPad (figure below)
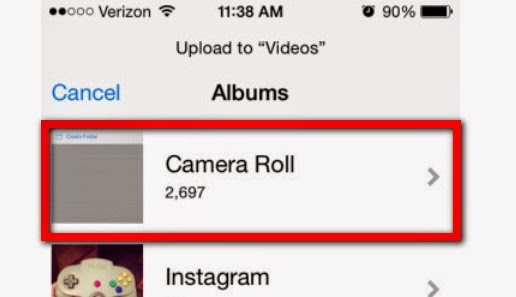
 Step 7: Select Video from Carera Roll (Figure below)
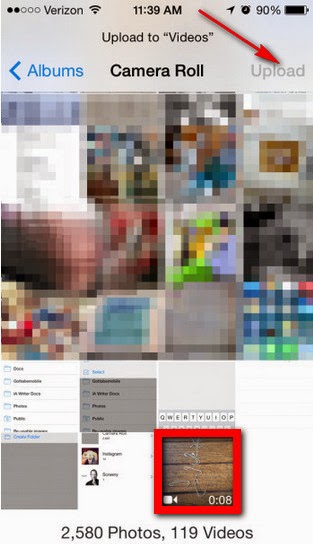
 Step 8: Once you have selected the video and then click on "Upload" in the upper (Figure below)
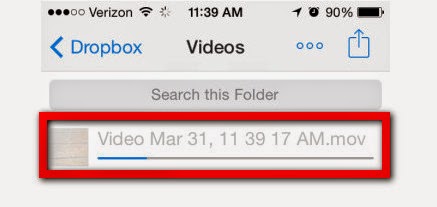
 Step 9: upload process will take a few minutes depending on the size of your video (Figure below)
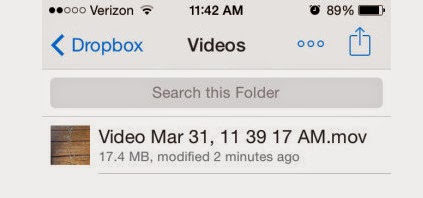
 Step 10: Once completed you can send this link to your friends computer to download and share. (Figure below)
 So the article above help you can share with your friends Full HD Video from iPhone, iPad via Dropbox convenient service.
Step 1: You open the Dropbox app on the device by clicking the Dropbox icon on the iPhone screen, your iPad (figure below)
Step 3: You click on the "Create Folder" (Figure below)
Step 4: After entering the directory name you click "Create" (Figure below)
Screencast – Record screen to video on Android
You want to record your operations on Android device to share the experience of using the device with your friend. With Screencast, you will record screen to video on Android devices extremely easily.
There have been quite a lot of applications of recording screen to video on Android devices. However, some applications are only compatible with a few models or are difficult to use. Will introduce a very easy application of recording screen to video. With Screencast for Android, you will conveniently record screen to video.
Preparations before recording screen to video:
- Android device with Root
- Download free Screencast for Android
In order to record screen to video, you follow steps:
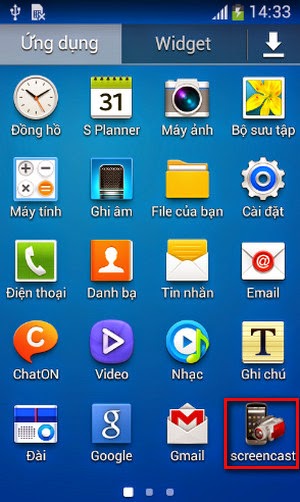
Step 1: Start ScreenCast after being downloaded and installed
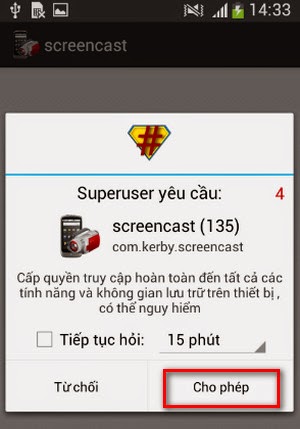
 Step 2: The first start of the program will require you to grant the application Root. Click Allow
 Step 3: Set up the configuration before recording screen to video. You have options as follows
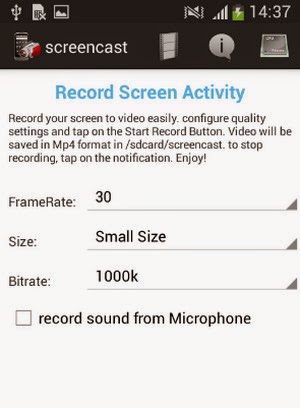 Frame Rate: Adjust the speed of the frame. Adjusting Frame Rate helps your frame smoother
Size: Have three options: Small Size, Medium Size, Original Screen Size to adjust the size of video after being recorded. If the size is low, the quality of video will be lower
Bit rate: Adjusting Bit rate to high level makes the quality of your video better nut also raise the size of your video
Record sound from Microphone: You can select recording sound with this option. The default is for no sound
Step 4: Click Record now to start. There will be a dialog box notifying you to purchase the full version of Screencast without ads. Select Record now!
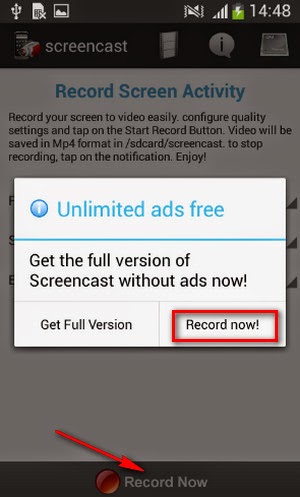 If you do not want the ads to be displayed, you can temporarily disconnect Internet while using Screencast for Android
Step 5: Perform the actions you need to record a video. Then if you want to stop recording a video, you can access Screencast application, select Stop recording or drag Notification bar and select Tap Here to stop recorder
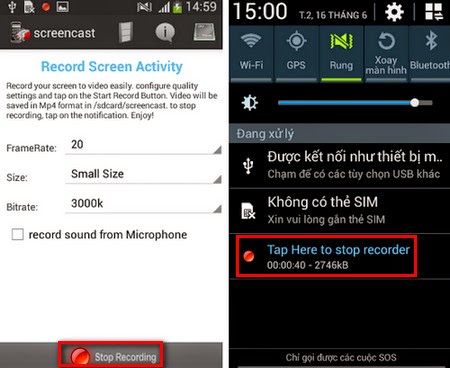
You can play the video just recorded immediately or share the video via email, Bluetooth, archive, etc.
There have been quite a lot of applications of recording screen to video on Android devices. However, some applications are only compatible with a few models or are difficult to use. Will introduce a very easy application of recording screen to video. With Screencast for Android, you will conveniently record screen to video.
Preparations before recording screen to video:
- Android device with Root
- Download free Screencast for Android
In order to record screen to video, you follow steps:
Step 1: Start ScreenCast after being downloaded and installed
Size: Have three options: Small Size, Medium Size, Original Screen Size to adjust the size of video after being recorded. If the size is low, the quality of video will be lower
Bit rate: Adjusting Bit rate to high level makes the quality of your video better nut also raise the size of your video
Record sound from Microphone: You can select recording sound with this option. The default is for no sound
Step 4: Click Record now to start. There will be a dialog box notifying you to purchase the full version of Screencast without ads. Select Record now!
Step 5: Perform the actions you need to record a video. Then if you want to stop recording a video, you can access Screencast application, select Stop recording or drag Notification bar and select Tap Here to stop recorder
You can play the video just recorded immediately or share the video via email, Bluetooth, archive, etc.
Copy phonebook to memory card and internal memory on Android
You want to copy your phonebook to internal memory or memory card to make it convenient for storing or copying them to other devices without having to use complicated tools. The copy of phonebook to memory card on Android is quite simple.
Phonebook seems to be one of the most valuable things on mobiles. It will be unlucky when you unintentionally lose hundreds or even thousands of contacts. To avoid having to collect phone number again, let’s copy your phone book to the internal memory or memory card or to the computer.
Android devices are integrated with an option which can enable you to copy your phonebook to memory card and internal memory. Let’s perform following manipulation to copy phonebook to memory card or internal memory.
Step 1: On the Menu screen, select Phonebook application:
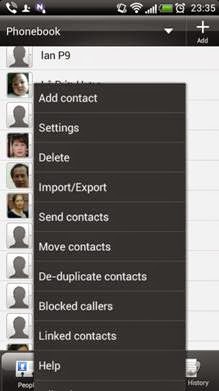 Step 2: Click to select menu of the phonebook by pressing touch button on the left bottom of the screen (or on the right bottom as in some other lines of mobiles such as LG)
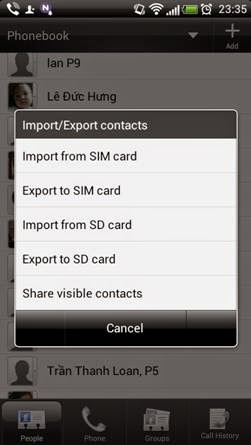 Click Allow/Export phonebook
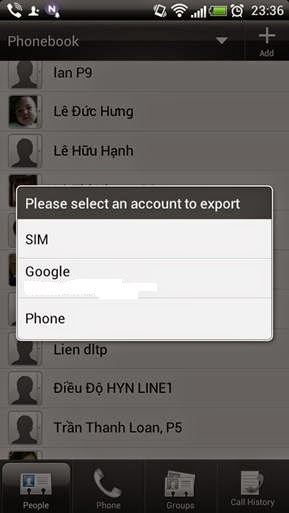
Step 3: Select Extract to internal memory of mobile or Extract to memory card if you have a memory card.
A notification will be displayed, if you agree to export the phonebook to File *.VCF, select OK.
 Wait for a moment for the phonebook exporting process to complete. You can check to see whether your phonebook has been exported to internal memory or memory card by entering file manager on the device or connect the device to the computer.
Above, has guided you how to copy the phonebook to internal memory or memory card on Android. With the file format *.VCF, you will be easy to store and copy the phonebook to other facilities or operating systems.
Phonebook seems to be one of the most valuable things on mobiles. It will be unlucky when you unintentionally lose hundreds or even thousands of contacts. To avoid having to collect phone number again, let’s copy your phone book to the internal memory or memory card or to the computer.
Android devices are integrated with an option which can enable you to copy your phonebook to memory card and internal memory. Let’s perform following manipulation to copy phonebook to memory card or internal memory.
Step 1: On the Menu screen, select Phonebook application:
Step 3: Select Extract to internal memory of mobile or Extract to memory card if you have a memory card.
A notification will be displayed, if you agree to export the phonebook to File *.VCF, select OK.
Above, has guided you how to copy the phonebook to internal memory or memory card on Android. With the file format *.VCF, you will be easy to store and copy the phonebook to other facilities or operating systems.
Enlarge subtitle and caption on iPhone, iPad
iPhone and iPad are equipped with a screen with high resolution which is very suitable for watching HD movies. However, the font of subtitle and caption is too small. Fortunately, you can enlarge subtitle and caption at your own intention.
Even iPad users should care about this matter although the size of iPad screen is 9.7" and screen of mini iPad is also 7.9". You will feel comfortable when placing the device a little far distance while still being table to read the content on the screen.
To enlarge the subtitle and caption on iPhone and iPad, follow below steps:
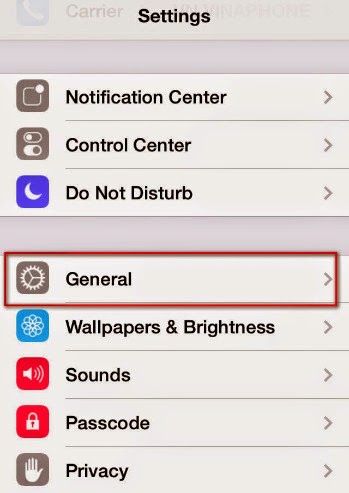
Step 1: On the menu of the main screen, access Setting > General
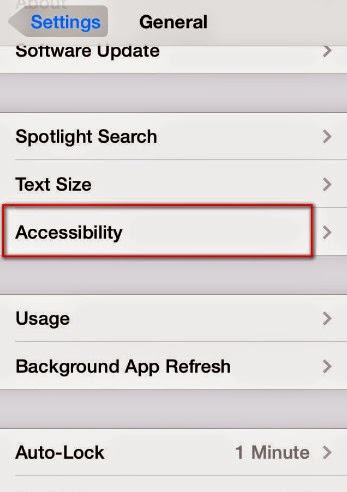
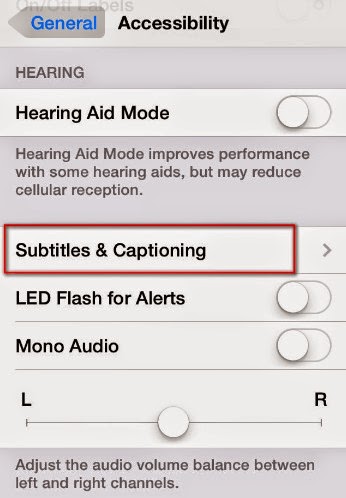
 Step 2: In General Menu, access Accessibility
 Step 3: Select Subtitle & Caption
 Step 4: Select Type of subtitle
 Step 5: Here, there are many options for you to select. Normally, you only need to select Large text.
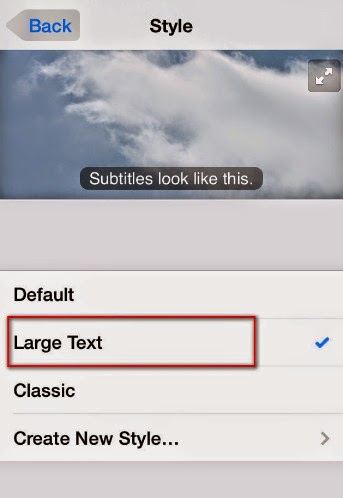 If you want to create a private type of subtitle, select Create a new type. Apple offers to you a lot of choice to customize: Font, size, color, etc.
With a simple setting, you have been able to enlarge font for subtitle when watching movies and videos on iPhone and iPad. For iPhone users. This is a really useful feature as the screen of iPhone is just from 3.5" to 4"
Even iPad users should care about this matter although the size of iPad screen is 9.7" and screen of mini iPad is also 7.9". You will feel comfortable when placing the device a little far distance while still being table to read the content on the screen.
To enlarge the subtitle and caption on iPhone and iPad, follow below steps:
Step 1: On the menu of the main screen, access Setting > General
With a simple setting, you have been able to enlarge font for subtitle when watching movies and videos on iPhone and iPad. For iPhone users. This is a really useful feature as the screen of iPhone is just from 3.5" to 4"
Reduce the opacity and white point to make iOS 7 clearer
On iPhone and iPad running iOS 7, you can easily see that the screen is too bright and its opacity is too clear to see. However, you can still reduce it in the Settings.
With the interface of iOS 7, the depth may not be paid much attention and icons are not displayed by bold due to the flat interface. It seems that the manufacturer has overdone it which has not been fixed from iOS 7.0 to iOS 7.1.1.
To reduce the opacity as well as the white color, follow the steps below:
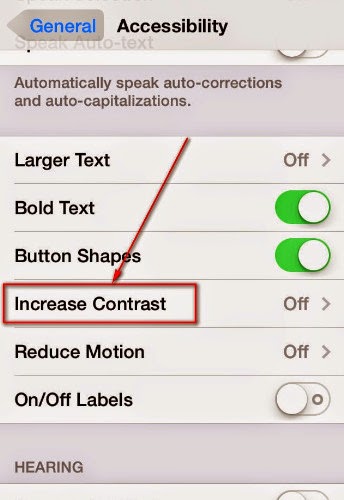
Step 1: On your iOS 7 device, go to Settings> General Settings> Accessibility> Select Increase Contrast
 Step 2: Here, switch all 3 options to green as shown below
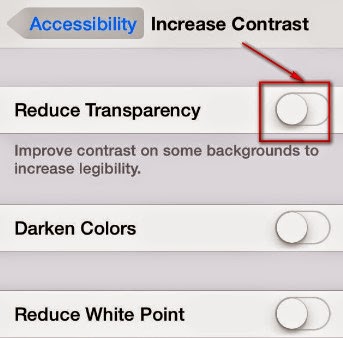 After 3 options are switched to green, the screen is darkened a bit. At the same time, the transparency in the application is also significantly reduced.
Thus, we have showed you how to reduce the opacity and white color on iOS 7 devices. This setting is particularly useful when you use the device at night. Besides, this setting also improves the battery of your device significantly.
With the interface of iOS 7, the depth may not be paid much attention and icons are not displayed by bold due to the flat interface. It seems that the manufacturer has overdone it which has not been fixed from iOS 7.0 to iOS 7.1.1.
To reduce the opacity as well as the white color, follow the steps below:
Step 1: On your iOS 7 device, go to Settings> General Settings> Accessibility> Select Increase Contrast
Thus, we have showed you how to reduce the opacity and white color on iOS 7 devices. This setting is particularly useful when you use the device at night. Besides, this setting also improves the battery of your device significantly.
Fix the error of no incoming call alert (no vibration, no ringtone) on iPhone
You are annoyed when your iPhone device cannot receive incoming calls when the screen is locked while the signal is still strong but the device only notifies missed call without vibration or ringtone.
If you meet the above problem, your device may activate the “do not disturb” mode. This mode is available on iPhone since iOS 6. This feature is quite useful when you are having a meeting or at night, or having an important calls and you do not want to miss the call.
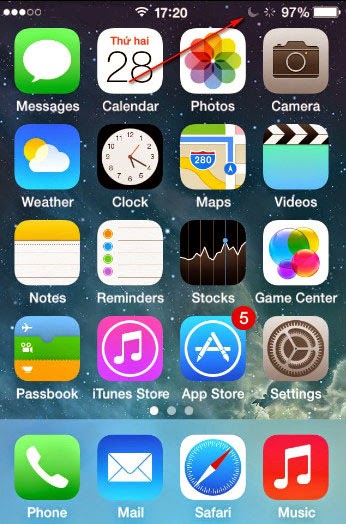
Before bringing your device to the maintenance store or considering you device to be broken, you should try checking if your device activates “do not disturb” mode or not. When this mode is enabled, it will have a moon icon next to the battery icon.
To disable this mode, follow these steps:
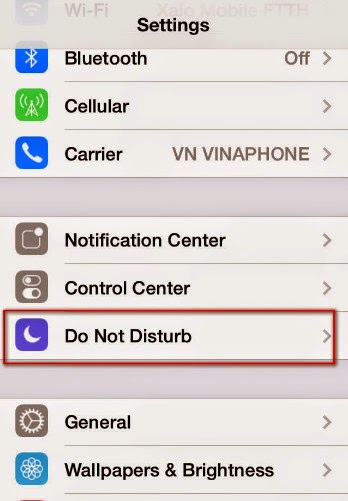
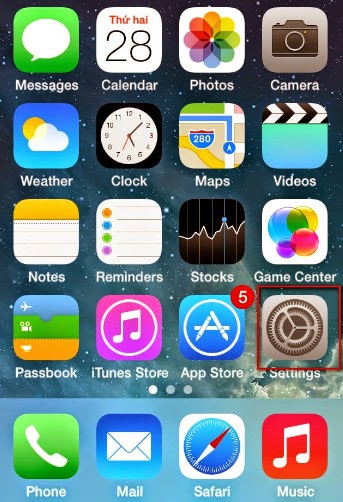
 Step 1: Go to Settings> Do Not Disturb
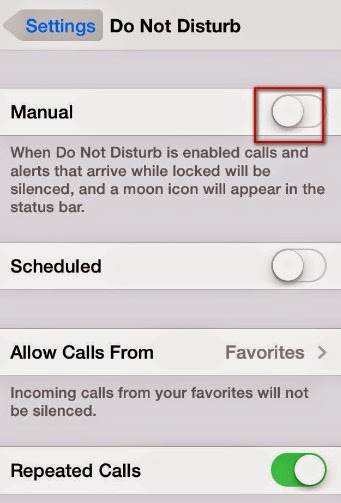
 Step 2: In Manual, switch to off
 Now, lock the screen and try to call your number to see if it has call alert or not.
Thus, we have showed you how to fix the error of no incoming call alert on iPhone due to “do not disturb” mode. If your device is not in the case above, you should restart the device or even reset software.
If you meet the above problem, your device may activate the “do not disturb” mode. This mode is available on iPhone since iOS 6. This feature is quite useful when you are having a meeting or at night, or having an important calls and you do not want to miss the call.
Before bringing your device to the maintenance store or considering you device to be broken, you should try checking if your device activates “do not disturb” mode or not. When this mode is enabled, it will have a moon icon next to the battery icon.
Thus, we have showed you how to fix the error of no incoming call alert on iPhone due to “do not disturb” mode. If your device is not in the case above, you should restart the device or even reset software.
How to turn off Control Center on iOS 7
You are having trouble with Control Center on iOS 7 since you are very uncomfortable while playing games but always accidentally slide and open Control Center. However, you can turn off Control Center completely while playing games or run any application.
Control Center is a very useful feature on iOS 7 produced by Apple. With Control Center, you can quickly control or use features without wasting too much time as before.
However, with the strange design of Control Center which is opened by sliding from the bottom to the top of the screen, it may bring dissatisfaction to users, especially, when you play game that requires sliding such as Temple Run, Au Mobile, ect, you will be interrupted by Control Center lots of times.
Fortunately, Apple allows us to customize Control Center. You can turn off Control Center when not using it. To turn off Control Center on iOS7, follow the steps below.
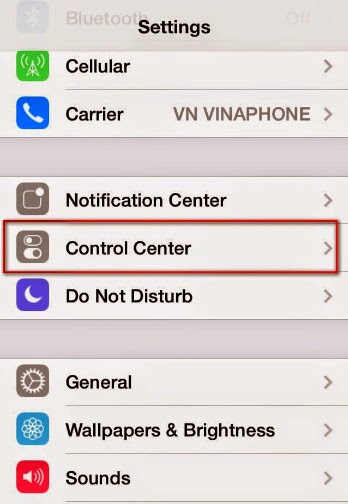
Step 1: Go to Settings on the main screen
 Step 2: Press Control Center
 Step 3: you have 2 options
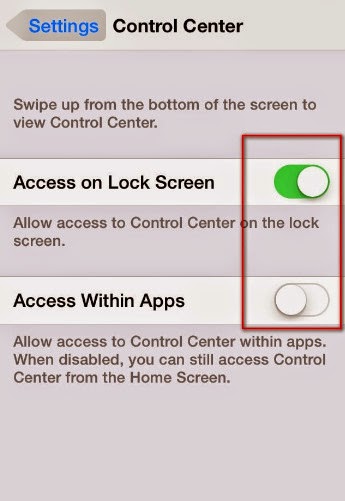 Turn off the second option: Access Within Apps to remove Control Center when using application
If you do not want to use Control Center on the lock screen, you can also switch On to Off.
With the steps above, you can turn off Control Center when playing games, surfing web, ect or use any application. However, you can still use Control Center on the Menu screen. Therefore, you will not have to switch back and forth every time you want to use the feature.
Control Center is a very useful feature on iOS 7 produced by Apple. With Control Center, you can quickly control or use features without wasting too much time as before.
However, with the strange design of Control Center which is opened by sliding from the bottom to the top of the screen, it may bring dissatisfaction to users, especially, when you play game that requires sliding such as Temple Run, Au Mobile, ect, you will be interrupted by Control Center lots of times.
Fortunately, Apple allows us to customize Control Center. You can turn off Control Center when not using it. To turn off Control Center on iOS7, follow the steps below.
Step 1: Go to Settings on the main screen
If you do not want to use Control Center on the lock screen, you can also switch On to Off.
With the steps above, you can turn off Control Center when playing games, surfing web, ect or use any application. However, you can still use Control Center on the Menu screen. Therefore, you will not have to switch back and forth every time you want to use the feature.


